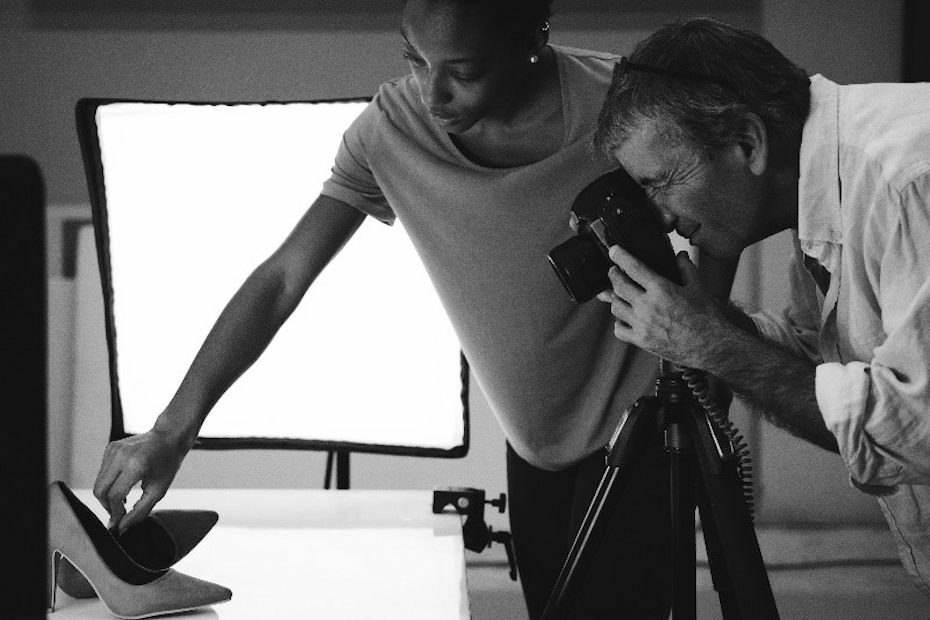
First impressions are important. This is why you’ll need great product photos, especially if you plan to sell anything on the internet. But not everyone has money to hire a professional photographer. You might need to take the photos yourself. So, in this next series of articles, we’ll show you how to take great DIY product photography with a homemade studio that costs less than $20.00.
We know that some of you really want to know about how to set up webstores so you can start selling, and you want us to get to that fast. But an ordinary snapshot of your product won’t help sales. We will definitely have a series on how to set up a simple webstore on the popular online markets. And, when you finally do set that up, you will have great product photos to go with it.
If you’ve never taken any photos beyond snapshots on your phone, don’t worry. DIY product photography is easy and painless. We’ll take this step-by-step.
Our Criteria for This Series on DIY Product Photography
Photography, in general, can get complicated and expensive. We’ve all seen professional photographers carrying bags full of equipment for photoshoots. And those cameras they use are full of buttons and dials that no ordinary human can understand.
You won’t need to know any of that. Our aim is for fast, easy, and cheap.
By the end of this series, you’ll be able to produce near-pro quality product photography using a point-and-shoot camera or even your smartphone camera. While you’ll still need to tweak your photos with photo editing software, you’ll be using a free and easy one. And you won’t need to know what an f-stop is or The Rule of Thirds.
Product photography is a very specific type of photography. So, let’s define what it is before we go further.
What is Product Photography?
This series is focused on product photography only. So, we won’t be discussing how to pose a model or how to set up a camera in a national park and wait for that perfect moment to shoot something like this.
Instead, you’ll be shooting a still photo in a photo studio using a simple—typically white—background. Your product and only your product will be front and center.
Your goal is for your potential customers to see a clear photo of your product. You might have several photos, each from a different angle. In the end, you want a customer to see enough of the product to be able to make a purchasing decision.
What You’ll Learn in the Series
We did a lot of research to write this series on DIY product photography (because we’re not a pro photographer either). We pulled and digested a lot of information from various sources. In the end, we think we found the easiest way for a layperson to take great DIY product photography.
We’re dividing the information into six articles:
- How to Take Product Photos Like an Almost Pro
- How to Set Up a DIY Photo Studio for $20.00
- Making a DIY Photography Diffuser and Reflector for Under $5.00
- How to Pick a Camera for Product Photography
- Five Photo Composition Rules for DIY Product Photography
- Photo Editing Software for DIY Product Photography
Don’t Forget to Optimize the Photos Before Uploading
Our articles take you from setting up the studio to editing the photos and getting them ready for print or online use. But before you upload it online, you’ll need to optimize the pixel and file sizes for your specific eCommerce platform or software.
What is Photo Optimization and Why Do You Need It?
Optimization changes the pixel density and file size of a photo. It basically helps your photo load faster on a customer’s device.
This is important because today’s customers tend to be very impatient waiting for a photo to download to their device. If they have to wait for too long, they often leave and go to another vendor.
You can change the pixel and file size of your photos with paid or free photo editing software. Some popular ones are:
- Adobe Photoshop (paid)
- Corel PaintShop Pro (paid)
- GIMP (free)
- Paint.NET (free, Windows only)
- Photo editor software native to Windows or MacOS (free, limited optimization and no compression capability)
You’ll have to poke around a bit to find the photo optimization controls. Usually, there are quite a few places where you can adjust the pixel density. With Photoshop, PaintShop Pro, and GIMP, you can compress the files too. Compression is usually found as a part of the save or export function.
If you don’t have access to Photoshop, PaintShop Pro, or GIMP, you can compress the photos with TinyJPG. You won’t have full control of the compression ratio, but the service is free.
When you upload your DIY product photos to the online marketing platforms, you’ll find that each has a preferred image size and file size. Here are some popular ones to keep in mind:
Facebook Marketplace
- File type: JPEG or PNG
- Ratio: 1:1
- Pixel Size: 1080 x 1080 or higher
- Max File Size: 30 MB
Here’s the link to the information.
Etsy
- File type: JPEG, PNG, or GIF (no animated)
- Pixel size: 2000 px on the shortest side and 72 PPI total
- Max file size: 1MB
Etsy has other preferred sizes for, e.g., logos, profile photos, etc., so be sure to double-check before you upload.
eBay
- File type: JPEG, PNG, TIFF, BMP, GIF
- Pixel Size: 800-1600 on the longest side, recommends pictures larger than 1,000 px, with max of 15,000 px
- Max File Size: 12 MB
For additional requirements, see this eBay page.
Amazon
Selling on Amazon is a little more complicated than selling on Facebook, Etsy, or eBay because Amazon has stricter requirements for its stores.
For photography, you can find the detailed requirements here, but the main requirements are:
- File type: JPEG, TIFF, PNG, GIF
- Pixel Size: 1600 px or higher preferred, 500 px minimum. 10,000 px on longest side max.
There are additional requirements for the main photo of the product.
Walmart.com
Of the online marketplaces in this blog post, Walmart.com is probably the most complicated. Here’s the page for Walmart’s image guidelines. The most general guidelines are listed below, but do check specific requirements for different categories of products as well.
- File Type: JPEG, PNG, BMP
- Pixel Size: 2,000 x 2,000 or higher preferred. 1,000 x 1,000 minimum
- Ratio: 1:1
- Max File Size: 5MB
Now That You Have Nice Product Photos, What’s Next?
Originally, we planned to write about product packaging next. After all, once you put up your webstore with the nice photos you just took yourself, you’ll expect people to buy. Then you’ll need something to package your product in, to send it to them.
We’ll still talk about product packaging, but we’re going to insert a blog post in between.
By happy coincidence, this series on product photography ends on December 31, 2021. We thought we’d do something special for the first blog post of 2022.
We’re going to introduce a new category of blogs: Entrepreneurship.
This is something we’ve been planning for a while. Under this new category, we’re going to share observations about the successful business people we’ve worked with over the years. We’ll talk about what strategies seemed to have worked for them and what seemed to have failed.
Read the first Entrepreneurship post to find out the details.
Questions? Comments?