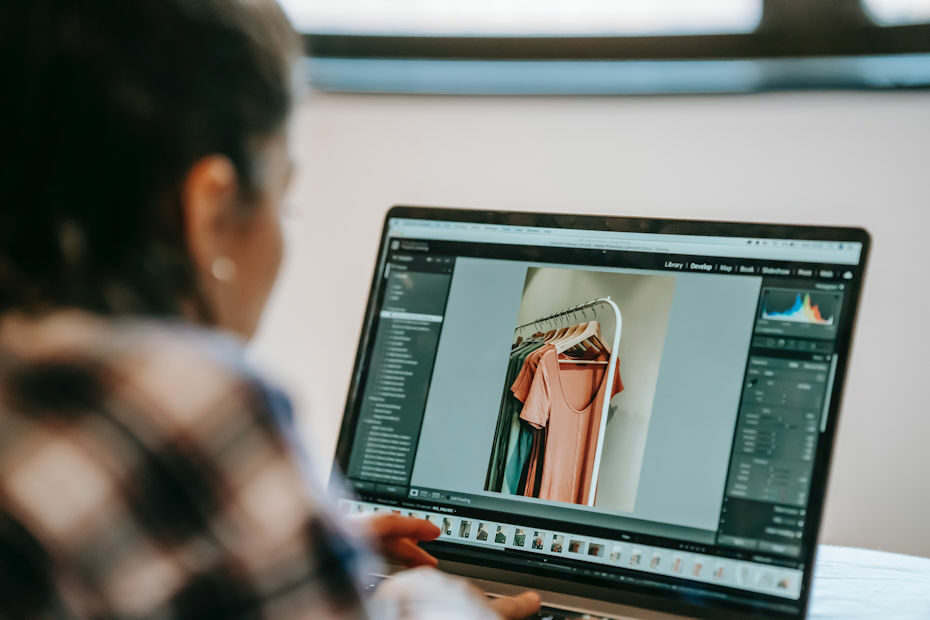
Photo editing software comes in all shapes and sizes. Some are on your phone only. Others are best used on a computer. Some are free. Others you’ll have to pay. The simpler ones tend to give you limited editing control, but the complex ones let you adjust down to the pixel. For product photography, you won’t need a very complicated editing software. What’s better, there are a lot of free, simple photo editing software you can use.
In fact, there are so many great and simple photo editing software that we really don’t have just one to recommend. Even though we’ll suggest a few below, we think the best approach is to talk about the software functionalities you’ll need. This way, you can pick your own favorite software to use.
- Popular Paid Photo Editing Software for Product Photography
- Free Photo Editing Software for Product Photography
- Whichever Photo Editor You Use, Make Sure It Has These Functions
- Don’t Forget to Optimize the Photo Before Uploading
- For Now, You’re Looking for “Good Enough,” so Don’t Get Bogged Down with Heavy Editing
Popular Paid Photo Editing Software for Product Photography
If you already have access to a paid photo editing software, you can, of course, use that. Paid photo editing software tend to have more functionalities and be more user-friendly. But, for editing simple product photography, the difference between free and paid isn’t that great.
Adobe Photoshop
Adobe Photoshop is probably the most well-known photo editing software in the marketplace. Without a doubt, it is the gold standard for pro-level work. Photoshop is easy to use and extremely powerful.
However, all that power is really lost in editing product photography. It’s just not that difficult to tweak product photography to make it look fairly good.
Photoshop is a subscription service. The least expensive plan, as of this writing, costs about $10/month. If you only have to edit a few photos a month, paying for a subscription plan may not be the best way to spend your money.
Corel PaintShop Pro
Corel PaintShop Pro is a well-known alternative to Photoshop. It is more beginner-friendly, but it doesn’t have as many functionalities as Photoshop. However, because product photography doesn’t require high-level photo editing, you won’t even know you’re missing these features.
PaintShop Pro is available for Windows machines only. To get PaintShop Pro, you pay once for a licensed copy of the software. It comes out cheaper than Photoshop. What’s more, you can use the software for several years. As of this writing, PaintShop Pro is on sale for $63.99.
We have a copy of PaintShop Pro that came bundled with a camera purchase. We’ve been able to do everything we need on it to build and run this website. If you only have to edit a limited number of photos a month, PaintShop Pro is a better buy.
But, of course, spend the money only if you want the convenience. You can use free photo editing software to achieve the same results.
Free Photo Editing Software for Product Photography
In addition to the paid photo editing software, there are a lot of free photo editing software in the marketplace. Some can be used on a cell phone, and others are for computers.
For product photography, we think editing from a computer is better. Computers are attached to larger screens, and you’ll need the larger screen to see the details you need to fix.
Below are some free photo editing software you can use.
GIMP
GIMP is a well-known, professional-quality editing software. It is open-source software, so you’ll never have to pay.
GIMP is every bit as powerful as Adobe Photoshop. You can also customize GIMP to your liking by downloading various plugins.
GIMP is not known for its ease of use, however. You will have to invest some time to learn what all the buttons are for. Fortunately, for the limited editing needs of product photography, you should only need a few of these buttons.
We recommend you download the software and play with it a little bit to decide if you wish to use GIMP or go with an easier software. (For product photography, we use an easier free software.)
Paint.NET
Paint.NET is another highly rated free photo editor. It’s a lot more user-friendly than GIMP, but it’s not as powerful. Some photo editing features found in GIMP are not available in Paint.NET.
We only have limited experience with Paint.NET. But, even with this limited experience, we think Paint.NET has more than enough functionalities for editing simple product photography.
Paint.NET is a Windows-only editor.
Photo Editors that Come with Windows or macOS
Both Windows and macOS come with free photo editors. They’re very user friendly, and they do an excellent job editing product photography.
Our computer runs Windows, and we haven’t used a Mac for many years. So, we’ve only used the Windows Photo Editor. Macs, however, have a reputation for being graphics friendly. So, we’re sure the native Mac photo editor is at least as good as the Windows photo editor.
The Windows editor handles editing in a far simpler and more intuitive way than Adobe Photoshop, Corel PaintShop Pro, GIMP or Paint.NET.
You won’t have to understand, for example, how to manipulate layers. Many other functionalities are auto adjusted as the user tweaks the photo with a slider control. Even cut and paste are simplified so you can grab parts of the image quickly and with little need to make corrections. This means you can start editing photos right away.
For editing product photography to near-pro quality, we think the Windows or Mac photo editors are good enough. (For pro-quality work, you should use Photoshop, GIMP, or maybe PaintShop Pro.)
Whichever Photo Editor You Use, Make Sure It Has These Functions
We think that any of the photo editors we mentioned above—and many that we didn’t—can do a great job cleaning up simple product photos. This is why we don’t have a specific editor that we feel strongly you should use.
But our preference is for the simpler, the better. So, we edited most of the photos in this series using the Windows photo editor. If you prefer to use a fully functional editor like GIMP, that is fine too.
To make it easier for you to pick the photo editor you prefer, we list below the functions in a photo editor you will need for product photography. This way, whichever photo editor you end up using, you will be able to edit your product photos without problems.
Crop and Rotate
Crop and rotate are the most important functions you will need. Fortunately, they are also such basic functions that any photo editor should have it.
You can fine tune the composition of your photo through cropping. If you shoot your photos in a cramped space, you can crop stray items at the edge of the photo out of the shot.
Rotating is self-explanatory—sometimes, the camera is not quite level when you take a photo, so you can correct the horizon with the rotate function.
Contrast and Exposure (Light)
Often, a photo can be subtly improved by adjusting the exposure and/or contrast.
If you took your photos in your DIY studio, you should only need minor adjustments. You should already have pretty good lighting in your studio. You’ve probably already adjusted the exposure on your camera before taking the shot. So, if you need to lighten the photo, it would only be for a little bit.
Other than cropping and rotating, this is the second function we use most for our product shoots.
Tint and Warmth (Color)
Sometimes, your studio light can give off a color that is too warm or too cold. You can fix this by adjusting the tint and warmth of the photo.
We do not often use this function, but you should make sure your photo editor have it just in case you need it.
Clarity
This setting helps to slightly sharpen the subject of the photo. We have not always found the setting useful. Still, from time to time, it can improve the final result.
Blur (Spot Fix)
The Blur feature is a must, even though you won’t use it often. In some editors, the feature is called Spot Fix.
Sometimes, you might have to blur out a trademark or make certain written words illegible for privacy. That’s when the Blur function comes in handy.
In many editors, you can blur a small flaw into the same color as the background. In effect, you “erase” the flaw. Often, the editor calls this function Spot Fix instead of Blur.
Whatever your photo editor calls this feature, it should definitely have this capability.
Don’t Forget to Optimize the Photo Before Uploading
You’re probably going to use your product photos mostly or maybe even exclusively for your webstore. So, before uploading, it’s best to optimize the photo’s file size and pixel density to the requirements of the selling platform or software.
All of the software mentioned in this article—yes, even the free Windows one—have the ability to adjust for file size and pixel density. Most of them also have a limited ability to reduce the size of or compress a JPEG file.
Still, if you want heavy compression so your website runs faster, you might have to go through several steps to get to the file size you want. Otherwise, before you upload, be sure to double check the image requirements for the selling platform or for your website’s software.
For Now, You’re Looking for “Good Enough,” so Don’t Get Bogged Down with Heavy Editing
It’s easy to get carried away playing with photo editing software. Not only can they tweak photos to make an already great shot look gorgeous, plenty of people spend hours and hours just making memes for amusement.
But that’s not why you’re reading our articles. You need high-quality shots of your products for your webstore. So, don’t let other fun things distract you (at least for now). Focus on finding the photo editor that’s easiest for you to access and use and continue to build your business. Here are some examples of before and after edited shots to show what we consider “good enough.”
Once you become successful, there will be plenty of time for fun distractions like learning to use Photoshop for the vacation photo you took with your $6,000 pro-level DSLR camera.
Questions? Comments?