
When we first looked into DIY product photography, we weren’t big believers in photography diffusers and reflectors. Photographers use these tools to soften the lights and shadows on the thing they’re photographing. But we like dramatic photos with contrasting lights. We were going to skip the photography diffuser and reflector in our DIY photo studio.
But this video showed us the difference between diffused lighting and harsh lighting. It convinced us that, at least for product photography, diffused lighting is the way to go.
Our DIY photo diffuser and reflector are a little different from the ones in the video linked to above. Here’s how we made ours.
Our Requirements for the Photography Diffuser and Reflector
Our DIY product photography series emphasizes low cost. So, we made our own diffuser and reflector.
If you would rather buy a commercial product, you can absolutely do that without spending a lot of money. For $20 or less on places like Amazon, you should be able to find not only white and silver diffusers and reflectors but also sets in multiple colors.
To be clear, when we say diffuser, we’re not talking about the silver, half-dome thing often attached to a camera flash. We’re referring to the translucent sheet of fabric or plastic placed in front of a studio light. Light shines through the diffuser and onto the object to be photographed.
Materials Need for DIY Photography Diffuser
To make a DIY diffuser, you’ll need:
- A medium sized corrugated box of about 18”x18”x16”. You might have one around the house, or you can save a box from your next online purchase. Office supply stores, moving companies, home improvement stores, or Walmart/Target all sell them for less than $2.00 each.
- A thin piece of white cloth that light can shine through. You can also use thin, translucent nonwoven material that you can buy from places that sell cloth. We used a cotton bandana (because it was already cut to the size we wanted) bought from a hobby store. It cost less than $2.00.
- Ruler, marker, and a craft knife/box cutter for measuring and cutting the box.
- Glue to affix the bandana to the box.
Assembling the Diffuser
Here are the steps to assemble your DIY diffuser:
Step 1: Make a Frame from the Cardboard Box
You’ll need a frame for the diffuser. Preferably, the frame can stand by itself.
To make the frame, first cut up and separate the cardboard box into four pieces. Each piece is made from one wall of the box, with the top and bottom flaps still attached. The flaps turn into a stand to help the diffuser stand up on its own.
Once you have separated the four sides, pick one of the sides to use for the diffuser. Measure and mark out a square or rectangle from the center of the side you decided to use. Leave about 1-1.5 inches all around to serve as a frame.
You should end up with something like this:
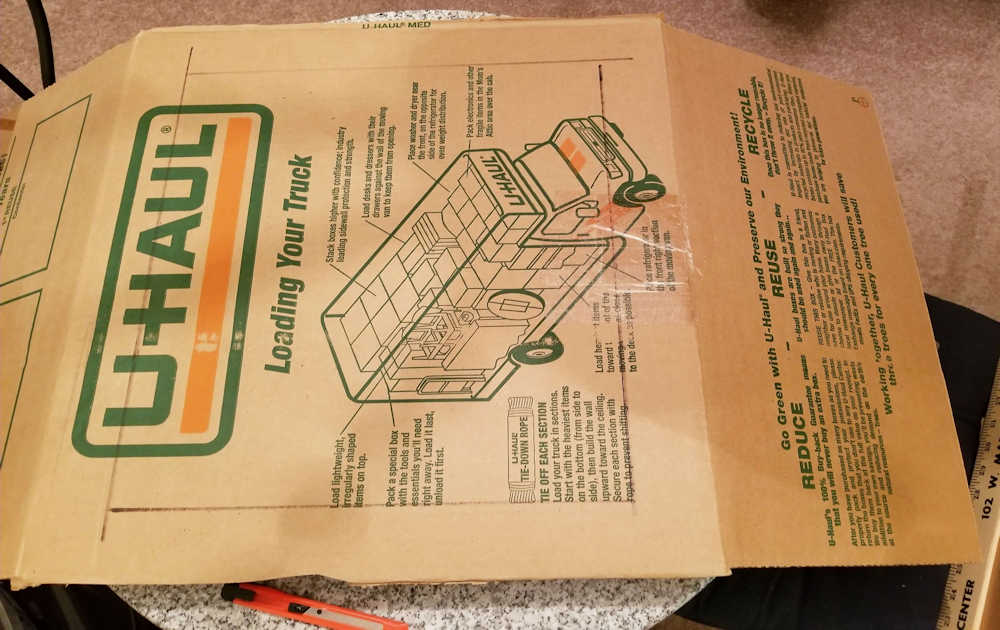
As you can see, instead of buying a new box, we recycled a used one to show that this can be done.
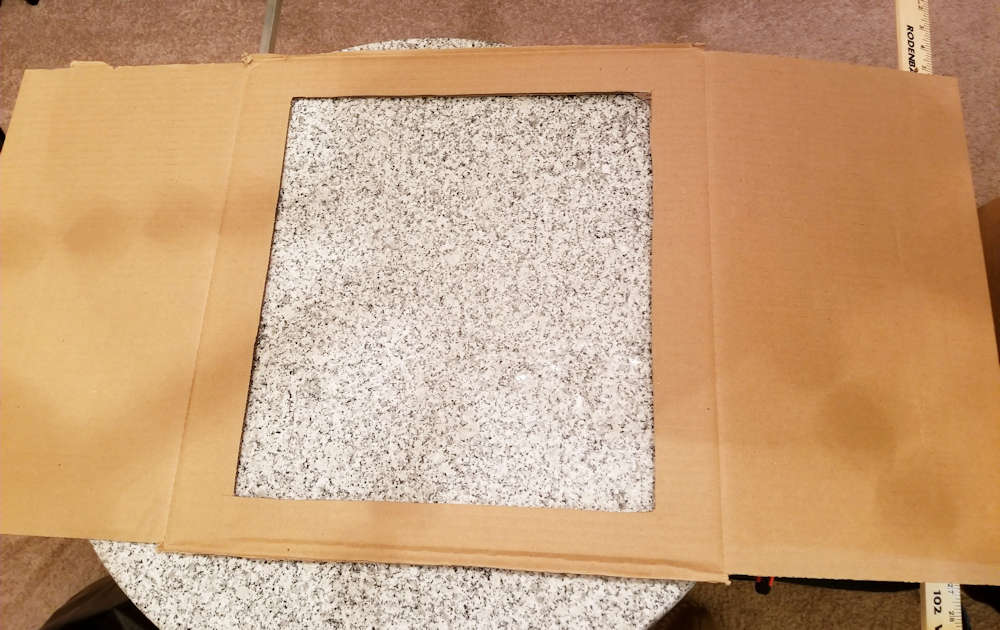
Step 2: Cut Out a Frame for the Diffuser
Use a craft knife, boxcutter, or similar to cut out the square or rectangle you marked. When you’re done, the box should look like a frame with two flaps on the side.
Save the piece you cut out. We’ll use it later.
Your frame should now look something like this:
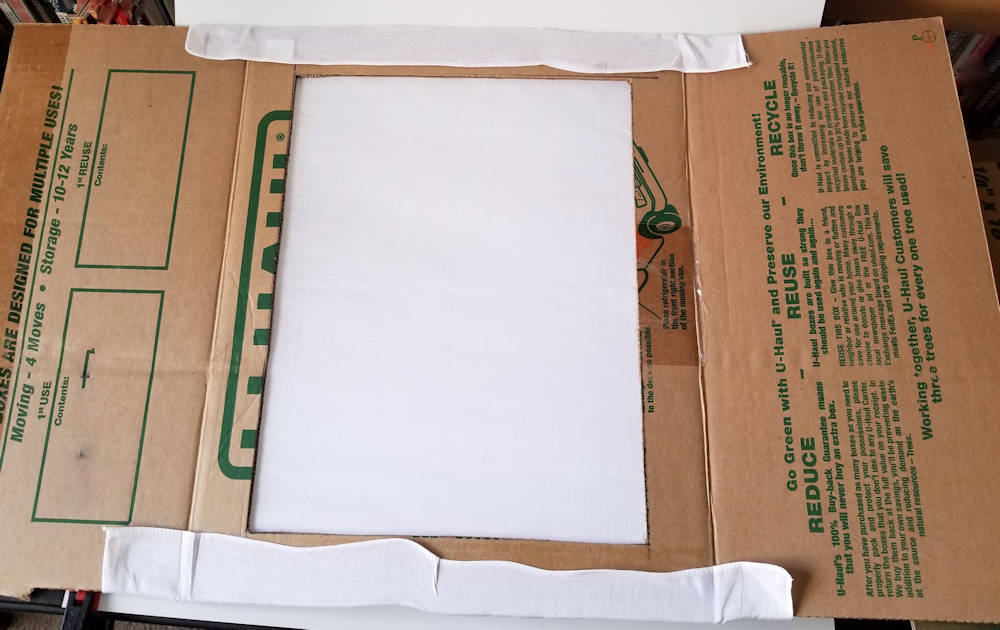
Step 3: Secure the Cloth to the Frame
Your last step is to secure the cloth or translucent material to the cardboard frame. Whatever material you use, make sure it is taught so that the diffuser doesn’t accidentally create shadows. Secure the material to the box using glue.
Here’s what ours looks like:
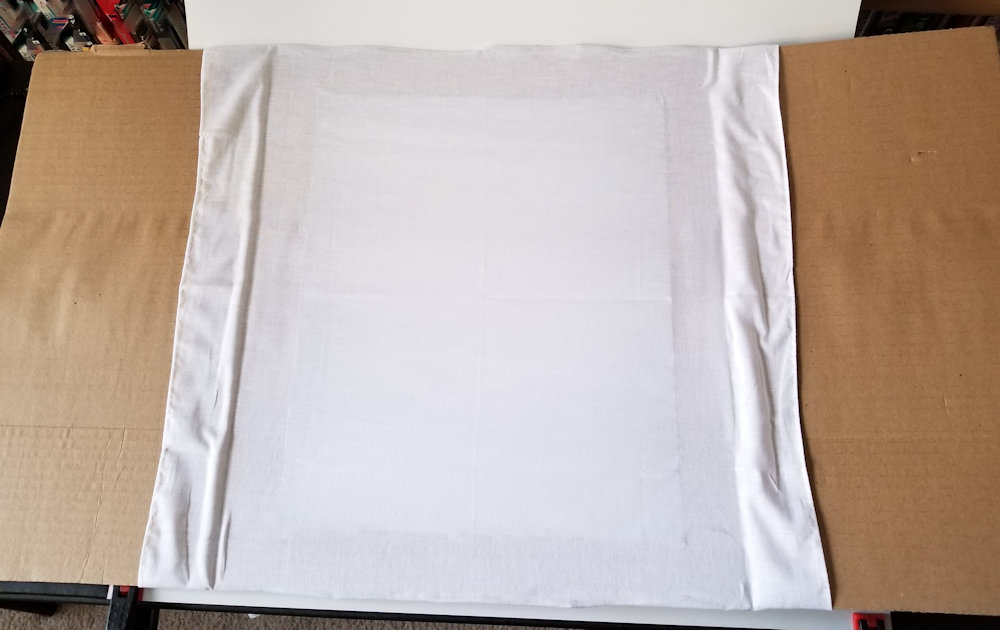
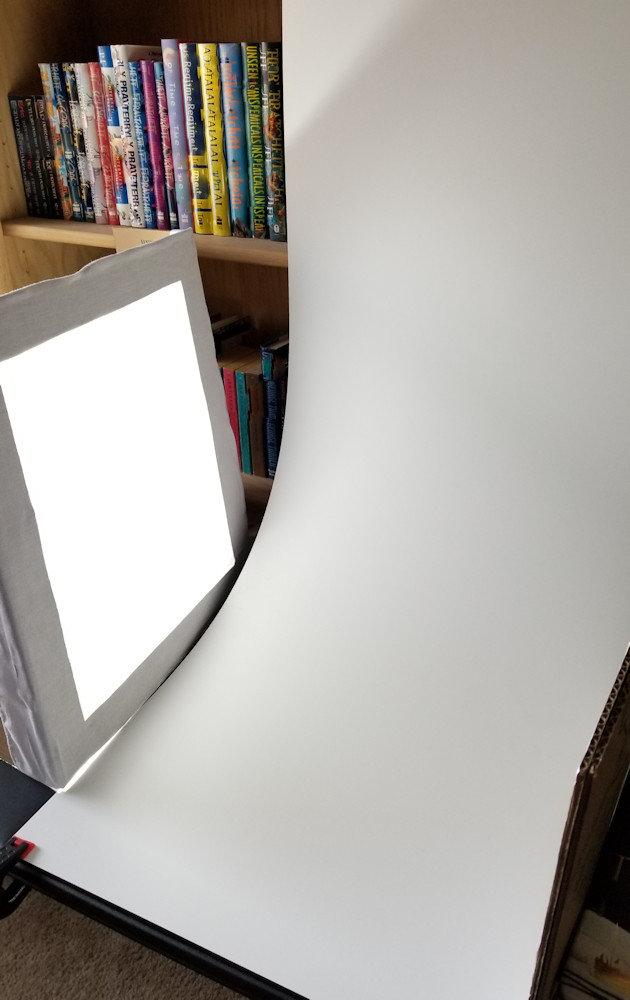
Step 4: Set up the Diffuser for Photos
Once the glue has dried, you’ll have a photography diffuser with the two flaps for a stand. The finished product won’t look pretty, but it will be serviceable.
Ours, when set up in our DIY photo studio, looks like this:
Making the DIY Photography Reflector
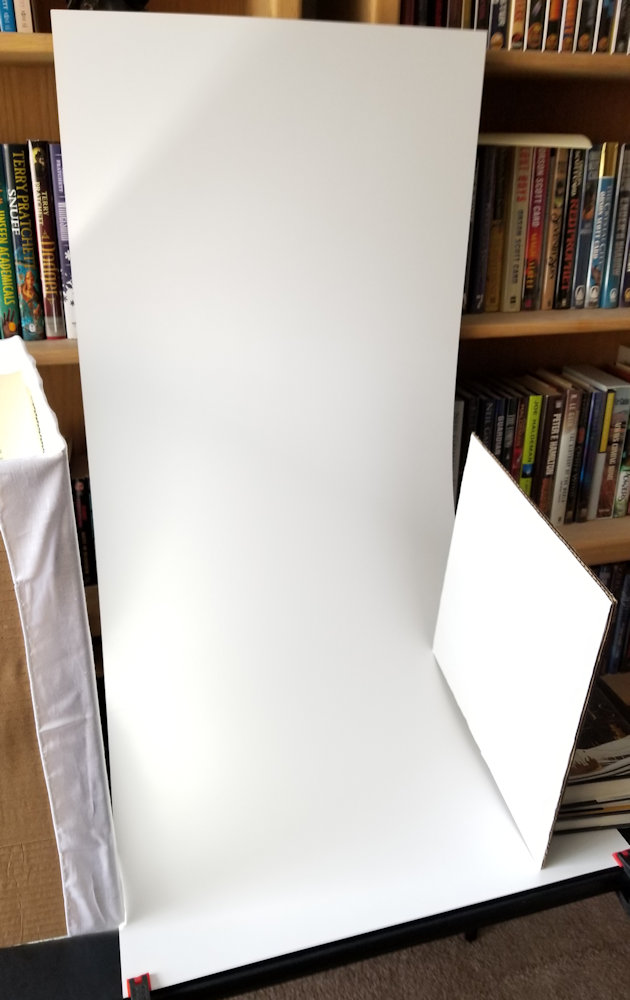
Remember that piece of cardboard you cut out from the center of the box while making the frame for the diffuser? You can recycle it into a reflector.
A reflector is simply a surface—typically white—that reflects your main light back to the thing you’re photographing. It helps to light your product from a different side to lessen harsh shadows.
To make the photography reflector, we glued white printer paper to the board that we cut out earlier. Once you have the white surface, you can set it up as a reflector like this:
For $5 or Less, You Now Have a Diffuser and a Reflector to Enhance Your Photos
If you follow the steps above, you’ll have a diffuser and reflector for about $2.00-$5.00. They didn’t take long to make, and they enhance the photo quite a bit
The next important piece of equipment you’ll need for DIY product photography is a camera. In our next article, we’ll discuss the different types of cameras available. And we’ll recommend a camera for you to use.
Questions? Comments?